Friday, May 8, 2015

OK, I ended up cheating!

BOMBSHELL!
I've relented and gone down the easy road, for the time being, ending up buying a Da Vinci 1.0 3D printer about a month ago. To be clear, I haven't abandoned my main theme here, but over the last 12 months it's become apparent that, in the absence of other specialist machining (reductive manufacturing) devices, my project would end up either, being a bit crappy, or, take forever (=never) to complete. At my tender age I need to factor in life expectancy when looking at larger, complex projects such as this. I'm also somewhat of a perfectionist with high expectations and standards
for my own work.

So here's the new toy:

So far I've managed a couple of prints, but have clearly got a long way to go to get to a level of confidence I'll be happy with. Researching how to deal with some minor issues led me to a lot of material suggesting that, instead of the included printer (slicing) software, "XYZware", Slic3r or Cura warrant consideration to improve printout control and resultant quality. In the case of Slic3r I need to consider reflashing the printer's firmware, risking "bricking" the device, so that option's been eliminated, at least for the time being.
In order to establish where my real problem lay (either my Sketchup design method, or in fact the printer limitations) I decided to use an item from Thingiverse.com, a great repository of other people's 3D design and print output. My pick was MorenaP's Treefrog, which came out quite OK and certainly established that the printer and it's loaded software and attendant XYZware were up to the task, so clearly I needed to go back to my Sketchup drawing board and up my skills there.


Friday, May 1, 2015

My collection of Parts

I intended including only a few images, but during the selection process I realised more is better so I'm including the entire album, some images have been graced with descriptions.


Discarded Epson PIXMA


Optical sensor on paper feed mechanism.

No fancy stepper motors here, just straight, cheap DC brush motor.
Accuracy totally relies on optical sensor feedback to control processor.

Print head carriage also uses optical sensor to detect and correct x axis positioning.

Here's and old Canon USB scanner ready for dismantling.


Compact electronics and single drive mechanism.


Stepper drive is the go with this one.


The (toughened) glass plate is from the Canon scanner above, it's positioned in the mock layout 
on the frame made using Connect-it pre-cut aluminium (aluminum in US) square tubing and plastic joiners which provide great strength and rigidity when assembled


The print head carriage assembly, which will provide y axis drive, positioned within the print bed support frame to establish layout spacing, glass print bed removed.

Here's a discarded Lexmark abandoned on the roadside with other household items. The manual was also carefully included. This unit actually sprang to life and managed to perform a scan, so why was it abandoned? CLUE: green thingy!

Looks like junior didn't like colouring-in, so hid pencil in printer! Of course clever parents weren't thinking about colouring-in when they wanted to use their printer, and it clearly failed due to "pencil jam". >>> BIN! thank you, good, working parts from this discard, including a working 1602 LCD.


Saturday, June 14, 2014

Why a 3D printer?

Why not! It's been ages since I've challenged myself, and given some of my other interests (electronics, EV's, tech, computing) and now some emerging needs (missing or modified plastic parts), the 3D print revolution has arrived just in time for me to "have a go" and get some results.
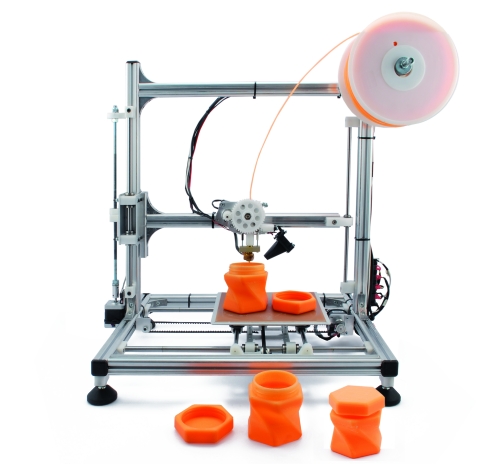
I'm hoping my finished product will look something like this:


My materials will predominantly comprise "stepper assemblies" recovered from discarded printers, MFC's or scanners. If you're considering a project such as this using such discarded items, my tip is go for MFC's (MultiFunctionCentres) which print and scan, that way you'll end up with three drive assembles per unit. While some of the units I've torn down use actual stepper motors, I'm finding the newer units I've recently attacked have DC motor drives incorporating slotted disks or strips for the fine positioning control. It appears the manufacturers may find this more economical than steppers? Any way, I've decided that the interrupter type using photodetectors is what I'll use for my axial drives, but I will be using one stepper drive to feed the filament into the print head.
On the control side I've committed to an Arduino clone ETHERMEGA made in Australia by FREETRONICS. I decided to "get all the fruit" as this unit has a built-in etherenet 10/100 NIC and an SD card slot for future developments. I'm learning heaps about Arduino very quickly, but my usual strategy of copying what works will be my main approach to getting this stuff working, I make no bones about that. In this blog I'll include links to sources I've relied on so you can emulate my findings for your project. Similarly I'd welcome any reader of this blog to add their ideas or alternative solutions by way of comments